Before I start talking about how to go about precompiling razor views in ASP.NET MVC 3, let’s talk about the why.
The foremost reason is performance. Razor views are compiled at runtime. In projects with many views, this can be slow down the app start-up time. For better performance, it is ideal to precompile your razor views.
Even if performance if not a criterion and you don’t have that many views anyway, you also get the advantage of making sure that your razor views do compile at build time rather than at runtime. By default, in MVC 3, you get compile errors from the razor view only when you hit that view from your app. You get no idea, even if you have some silly typo ( though your IDE might be complaining ), till you hit the app. It is nice to have the safety net of compiling your razor views at build time.
Note that precompiling razor views, as will be described here, is NOT the came as compiling them. MVC 3 has the MvcBuildViews feature whereby, by changing the default <MvcBuildViews>false</MvcBuildViews> to true in you csproj file, you can compile your razor views at compile time. But this can only be used for catching compilation errors in your views, and it’s not the same as precompilation. If you don’t want precompilation, you can live with this. It is a simple one line change in your csproj file, and you get the safety net that we talked about. Precompiling your views is slightly more complex. But, MvcBuildViews will slow down your build ( maybe that is the reason why it is not enabled by default!). It is just not as efficient as the precompilation technique that we are going to talk about. In our project, with lots and lots of views, the build time with precompilation was faster than the build time with MvcBuildViews by a whopping 50%. Thats a lot you can shave off your build times.
Another reason to use precompilation is that you don’t need to deploy all those .cshtml files to your web server. This will reduce deployment times, especially, again, for projects with many view files.
Hope these reasons convinced you that precompiled razor views is the best thing since sliced bread. I will talk about the specific approach that I took to achieve this. We will be using the amazing library called RazorGenerator.
Go ahead and install the Nuget packages RazorGenerator.Mvc and RazorGenerator.MsBuild into your MVC project.
The RazorGenerator.Mvc package brings in the PrecompiledMvcEngine and registers it as the view engine in your mvc project. It does so in the RazorGeneratorMvcStart class found under App_Start folder:
[assembly: WebActivator.PostApplicationStartMethod(typeof(MvcApplication1.App_Start.RazorGeneratorMvcStart), "Start")]

namespace MvcApplication1.App_Start {
    public static class RazorGeneratorMvcStart {
        public static void Start() {
            var engine = new PrecompiledMvcEngine(typeof(RazorGeneratorMvcStart).Assembly) {
                UsePhysicalViewsIfNewer = HttpContext.Current.Request.IsLocal
            };

            ViewEngines.Engines.Insert(0, engine);

            // StartPage lookups are done by WebPages.
            VirtualPathFactoryManager.RegisterVirtualPathFactory(engine);
        }
    }
}
It uses WebActivator to add the PrecompiledMvcEngine as a view engine in your project. Note also the line UsePhysicalViewsIfNewer = HttpContext.Current.Request.IsLocal. That enables you to develop with precompiled razor views as you would have done before. When you make changes to a razor file, you don’t have to compile your project ( and hence precompiling the razor views ). Just refresh the app and see the change. As is obvious from the line, if the actual .cshtml file are newer, it will use them for local requests, instead of the precompiled version. This means seamless transition to precompile views. Neat!
Now, let’s get to the exciting part - hooking up the actual precompilation of views at build time. This is where the RazorGenerator.MsBuild package comes into the picture. It provides msbuild targets to precompile your razor views that you can hookup into your csproj.
You want to import the RazorGenerator.targets that comes with the package in your csproj:
<Import Project="$(MSBuildExtensionsPath32)\Microsoft\VisualStudio\v10.0\WebApplications\Microsoft.WebApplication.targets" Condition="false" />
<Import Project="$(SolutionDir)\packages\RazorGenerator.MsBuild.1.5.0.0\tools\RazorGenerator.targets"/>
The second import is the one being added, and I add it below the one importing the WebApplication related targets.
Next, you have to add a property that the target imported from the RazorGenerator.targets files uses to check if precompilation is to be done or not:
<MvcBuildViews>false</MvcBuildViews>
<PrecompileRazorFiles>true</PrecompileRazorFiles>
PrecompileRazorFiles is the property being added and I have added it just below MvcBuildViews in the csproj for obvious reasons.
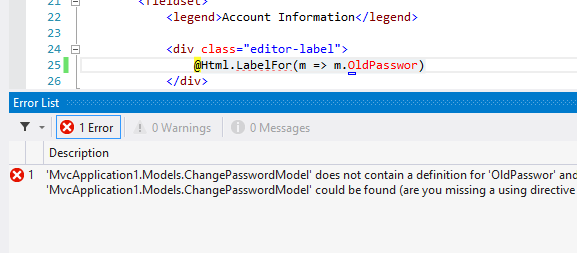
That’s it! You can now build your application and the views will be precompiled. Try introducing a compile error in one of your razor views and you should get the error when compiling your solution. The precompiled files will be generated under obj\CodeGen.
There is one more thing that you have to do if you don’t want to include the views as part of your deployment package. By default, the .cshtml files will be created as Content type. The web applications target looks for all content types and includes them in the _PublishedWebsites folder. So you have to change the Build Action for your views to None so that they don’t get included. This can be easily automated without changing the view properties. Just add the below to your .csproj
<Import Project="$(SolutionDir)\packages\RazorGenerator.MsBuild.1.5.0.0\tools\RazorGenerator.targets"/>
<Target Name="BeforeBuild">
    <ItemGroup>
      <Content Remove="Views\**\*.cshtml" />
      <None Include="Views\**\*.cshtml" />
    </ItemGroup>
</Target>
I am adding the BeforeBuild target right after the previouly added line to import the RazorGenerator.targets file. The BeforeBuild target is a hook provided to do things as a pre-build event. Here we remove all .cshtml from Content itemgroup and add them all to the None group. Now, when the web applications target is executed, the views will not be copied over as they are not Content type anymore.
That’s all there is to it.
Wait, what about using the RazorGenerator Visual Studio extension which generates the backing .generated.cs file when you save the file. I decided not to go with that approach because using the msbuild targets is much cleaner. With the extension approach, not only do you need an extension to visual studio that every team member has to be told to install, all view files, old and new, have to be edited to specify a custom tool. Also, the .generated.cs files pollute you solution while navigating. Too much of an hassle, and I don’t recommend that approach. Using the steps given above, you can achieve precompilation of your razor views without any changes to the way you have been developing so far.